


 Once the logos have been carved into the wax it's time to flip them over and hollow out the back. I hold them up to a light so as to be able to achieve a consistent thickness throughout.
 I then use my wax pen to add details like the findings to the back, as well as to clean up any nicks in the wax that have occurred in the carving process. These particular buckles were made as gifts and so I also added the recipients names to the back in
  the wax before I cast them into jewellers bronze (a mixture of sterling silver and copper). Once cast they still need to be filed, sanded and polished as well as have the moving fas
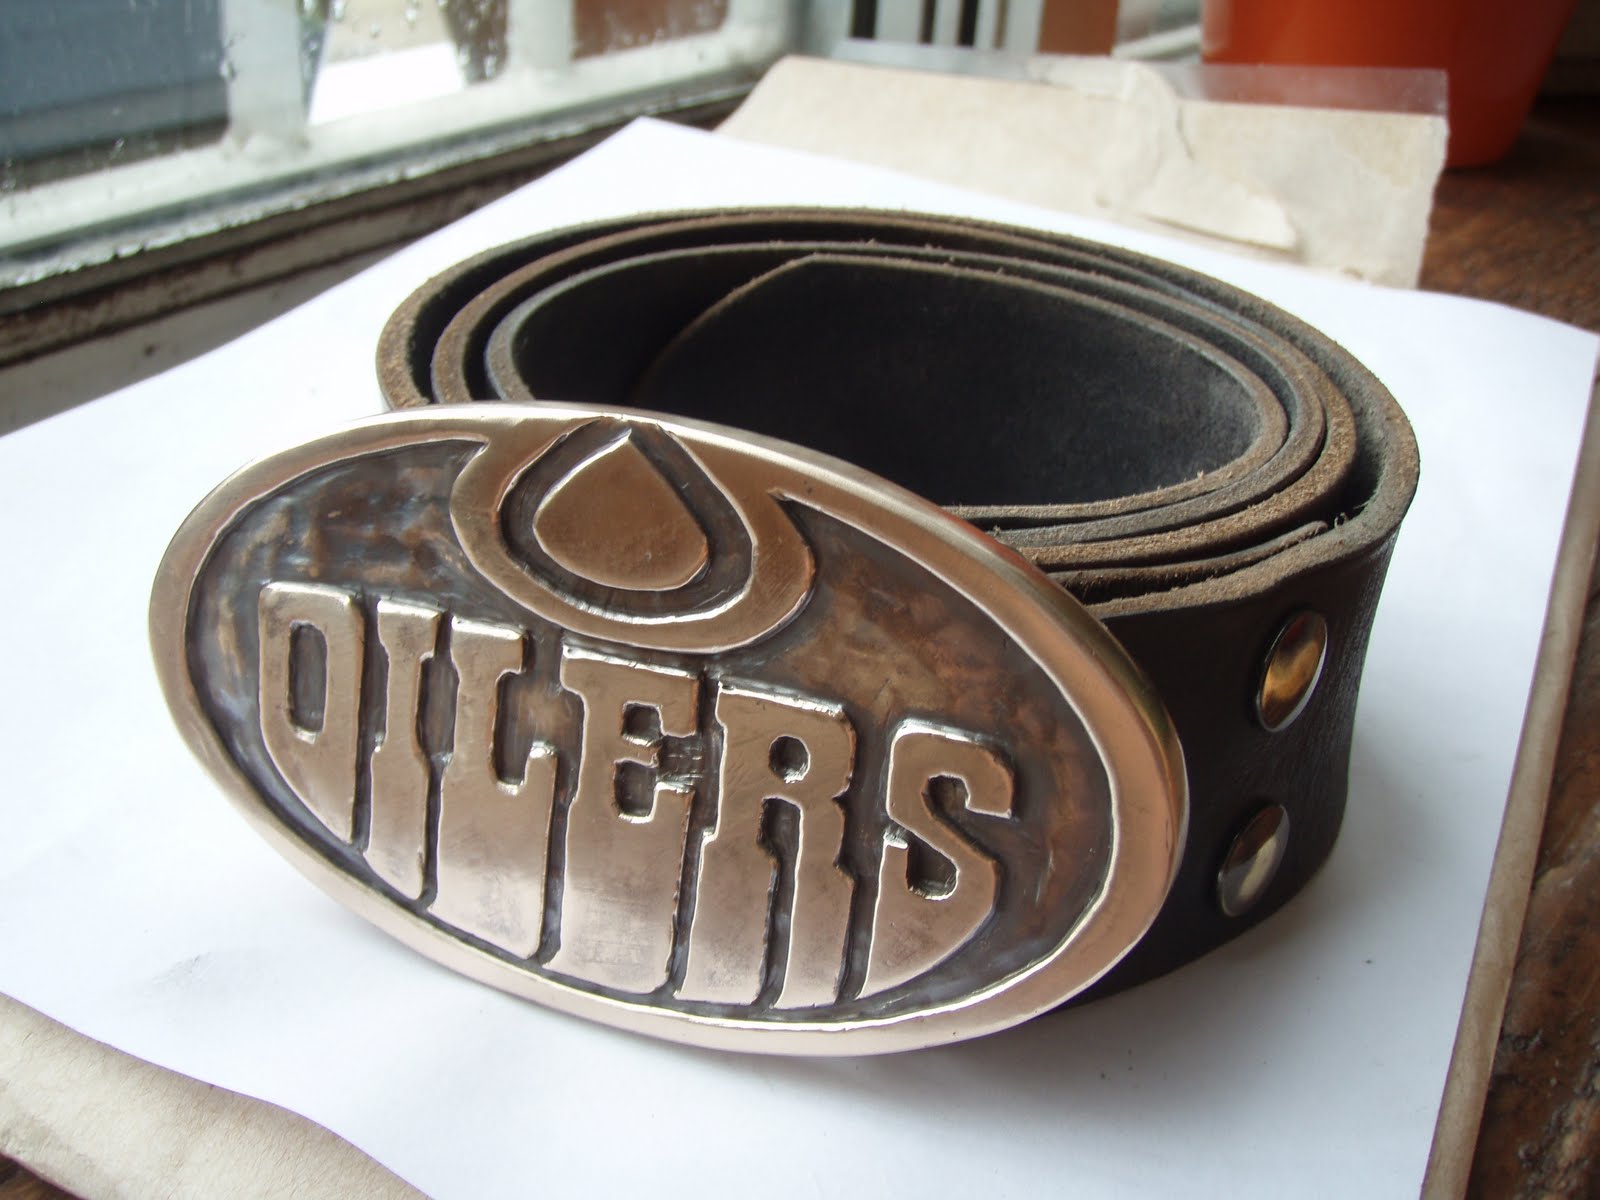
 tener for attaching a leather belt added and hammered in place. I have added a rich dark patina to give them an aged look and provide a dark contrast into the crevices in the background. It's then time to polish t
 hem and add leather for photographing. They are being produced, numbered 1 to 50, in a limited edition series that should soon be available for purchase on the web.


