Tuesday, May 20, 2014

My engagement....


2013 was a very big year for me. It was busy and life changing and apparently I didn't have time to post a single blog entry. With so much going on I certainly need to rectify that and fill people in.  I met my fiance on Halloween day in 2011 and convinced her to move in with me within a couple of weeks. By Sept of 2012 I had plans to marry her and had a beautiful half carat eighty eight cut diamond set aside for me in my diamond dealers safe. The one I
picked out fluoresces under black light, not all do, not everyone considers it desirable, I think its pretty neat. I spent the next many months designing the ring in my mind and saving my pennies, literally. My diamond broker told me that mine was the first diamond that he had ever seen purchased partially with rolled change. Once the stone was in my possession I set about making plans to propose.... Oh ya, and I had the rare honor of building the ring that my fiance now treasures. White gold and sterling silver mokume gane is a favorite of both hers and mine so naturally I wanted to incorporate it. I built the frame and setting out of 19k white gold for both strength and beauty.
I inlay-ed the mokume gane, marked out the placement of the diamond accents, drilled holes and soldered in more 19k white gold. Now my diamond gypsy set accents will be surrounded by another edge of 19k white gold, a time consuming detail but one that I'm very pleased with.  Everything needed to be filed and sanded to shape and the main setting needed to be soldered in place. Some polishing and then it was time to address the diamonds, two of my accent stones are black diamonds to continue in the black and white theme that I started with the mokume gane.
I set the stones and moved on to even more challenging parts of the procedure..... I told/ asked her father, which turned out to be more nerve racking than I thought it would be. His response "right on!", set me at ease. I borrowed a camera from a photographer friend of mine, one that had the ability to be set up and take photo after photo so that our proposal could be captured in stop motion. The results were amazing, if I can get some tech help I'll attempt to post the short video clip at some point. I chose to propose in a spot close to my fiances home town, on a hike she had been dying to take me on.
Luckily, the location was perfect, I knew it would be. Her father coordinated a surprise BBQ for afterwards so she got to spend the evening with friends and family. It couldn't have gone any better, we've since been planning for our 2015 wedding. Planning big life events seems to occupy a great deal of my time these days, I'm not complaining, just letting you know why it took me so long to update my blog......


Tuesday, November 6, 2012

Inspiration


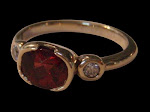
Inspiration is a funny thing. It can come from anywhere. You don't always need to have all the details sorted out either, part of my job is helping in the process. Some of my clients bring me their ideas already completed and all that's left for me to do is build the design. Other clients have an idea that we develop together, some people need me to take the lead on the entire process, everyone and every job is different. The Diamond engagement ring pictured above is a modified replica of my clients girlfriends favorite ruby ring that she wore every day.

 I built a Sterling Silver 1957 Chevy belt buckle based solely on a picture that my client brought to me.                 
  A recent client wanted engraving that was symbolic and had meaning to both he and his girlfriend. After much back and forth I prompted him to think of travels they had had together and places they had been, objects that they had purchased while abroad  that were prominent in their home. He settled on a replica of some patterning in a carpet that they had brought home from the middle east. It's a focal point in there living room and now in her ring as well. Keep an open mind and inspiration will find you, if it's taking too long, call me and let me help.                                               

Wednesday, March 21, 2012

Crazy Chunky Dream Ring


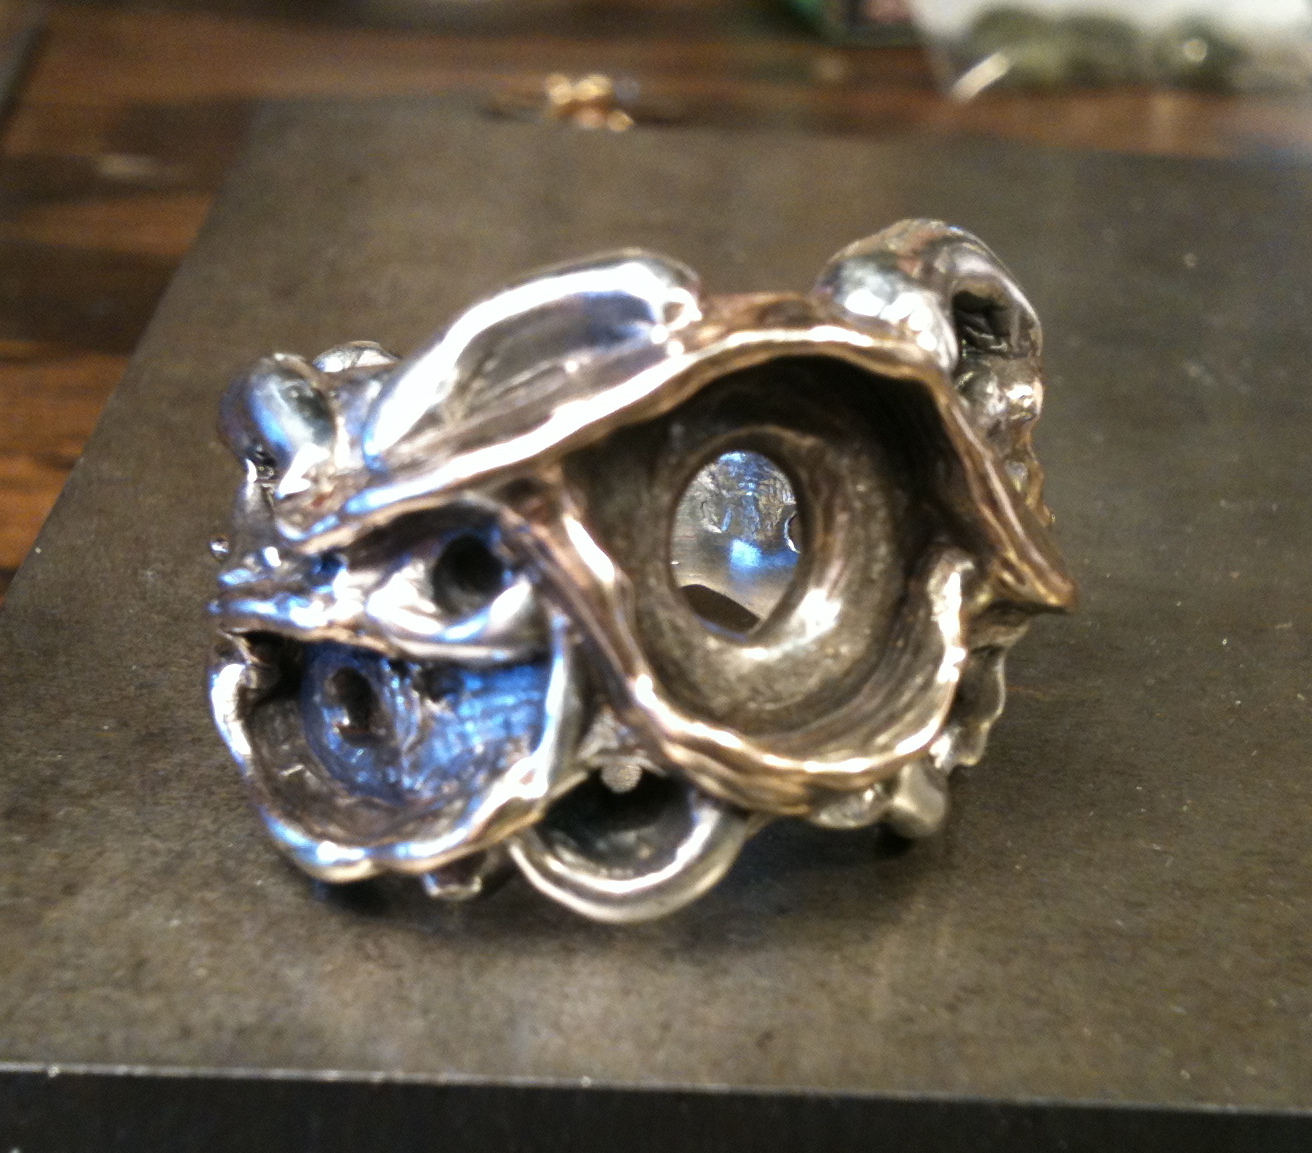
I like my job. It is creative and artistic and allows me to bring ideas to life. But rarely do I have the opportunity to work with a client who is even more passionate about pushing the boundaries of an idea than I am. This job provided me with that opportunity. My client had been dreaming about this ring for years. Literally having dreams about it. So my challenge was to get inside her head and envision this ring that she already saw clearly in her mind. Daunting, yet exciting and challenging all at once. We knew the ring was going to be big and chunky. We knew that it was going to be adorned with many gemstones, some of which were sentimental and provided by my client, and some of which I had to find to compliment the idea. We knew that it was going to be organic and some what dark, with an influence we described as like roots or bramble bushes. It was going to be two tone, both gold and silver. The bezels surrounding six of the thirteen stones were to be cast in 10k yellow gold, so I started there. Carving and building those six bezels and having them cast. Once I had the gold bezels I carved the basic ring shape in a block of wax and sunk my gold bezels into the wax by gently heating them and melting them into my wax ring/block. I then completed the wax carving with the gold portion embedded firmly into the wax that was due to be cast into sterling silver. I cast the silver with the gold already in place and although the gold seemed solid then soldered them permanently in place. The next step involved a great deal of grinding and sanding to achieve the fluidity I desired, it also helped me eliminate extra bulk and weight. After polishing and applying a colored patina, it was time to set all of the stones and complete the final finish. I'm proud of the final product and even more importantly, my client was thrilled. It was a pleasure to work on and it sounds like there may even be a matching pendant in the future!!!


Thursday, January 5, 2012

Custom Christmas Rock Star Buckle!

I've shown this process on my blog before, but the feed back I get from people is always so great, so here I go again. This is how I carve a block of wax into a custom made belt buckle. This particular buckle was given as a Christmas gift to one of the members of a great local band here in Vancouver, BC, The Washboard Union. I started by cutting a slab of wax from a large wax block using a special wax blade on my jewellers saw. Using a cheap file and rasp that I bought years ago at Canadian Tire I then flatten and smooth the slab until I deem it ready for the template. I've re-sized the bands logo on my computer and printed it out to be the exact dimension that I need for the buckle. This to me is by far the hardest step as I'm much better at carving wax or hitting metal with a hammer than I ever will be at using a computer. The very fact that I'm uploading blog posts sometimes boggles my mind! Once I've taped the printed template in place I begin the painstaking process of transferring the image onto the wax, this is done by poking little holes through the image and into the wax using a sharpened scribe. I often have to do this step in a couple sittings due to hand cramping. Once completed, I remove the paper template and begin connecting the dots. The next step involves pulling out a bunch of old dental tools, each one specially modified so that it can reach here, or scrape away wax there, where another one just might not do the job. Again, a few sittings were required to completely remove all the wax from the unwanted negative spaces. If an error occurs I also have an electronic wax pen that can re-add wax where it is needed, allowing me another chance to get it right. I then begin on the finishing details, laying out the back, adding little wax skulls for findings. Modifying them to make a hook to hold the belt. Adding a custom inscription, shaping the edges and adding a border, etc.. etc.. When I'm completely satisfied with my wax it then gets encased in investment material which is sort of like a high tech concrete. It's then put in a kiln, so that all the wax melts away, leaving a perfect void inside the investment in the exact shape of my carving. Using science and the wonders of centrifugal force, molten metal, in this case jewellers bronze is injected into the void. Once cooled, the investment can be broken away revealing our bronze buckle. There is still a great deal of sawing, filing, sanding and polishing that needs to take place before it resembles the buckle shown here in the picture, but this in essence is the process of creating a Custom Christmas Rock Star Buckle!

Monday, December 19, 2011

X-mas studio sale

This past Saturday D Gallery hosted a Christmas studio sale/ open house for Mindans designs (www.mindans.com) and DuKo designs (www.duko.ca). We pushed back the walls and opened up the entire space to accommodate for the potential of a crazed holiday rush. There was a steady flow of people through out the day, with many people picking up last second holiday gifts. Others were just stopping by to say hello and some people indulged in various little treasures for themselves. Mindan was kind enough to provide some free jewellery gifts to a few pleasantly surprised guests. Snacks consisted of mini quiches and awesome cookies from our favorite neighbors the Kranky cafe (www.facebook.com/KRANKYcafe). Steam whistle generously provided us with delicious ice cold beers and of coarse there was red and white wine, and other various refreshments. As well as fine hand crafted jewellery pieces we also had gorgeous hand made cards for sale, provided by both Aaron Grain and Kelsey Pangborn. There were Christmas tree decorations, made by local artist Jennifer Ettinger, with all proceeds going to Vancouver little league baseball. The room looked great with all the various displays set up and the day ran very smoothly. I'd like to thank everyone who helped us set up and run the show and everyone who stopped by, and of coarse my lovely studio mate Mindan. I had a fantastic day and look forward to the next time D gallery hosts an event. I hope that everyone has a very safe and happy holiday season surrounded by many friends and family, and thank you for reading the DuKo designs blog, until next year.....

Tuesday, November 29, 2011

Same same but different

It's common for people to have jewellery sitting in a box that they no longer wear. This occurs for a variety of reasons, it may be that the jewellery piece has fallen out of style or that the owner has just become uninterested or bored with it. Maybe all that is needed is a little modification...? Such was the case with this 18k yellow gold and Platinum ring that I recently took a file and sand paper to. While the ring on the left is unique and interesting, it is also somewhat dated and needed a little tlc to become what my client really wanted. The end result, shown at right is cleaner and simpler, and will stand the test of time with it's much more classic lines and lighter feel.

Tuesday, November 8, 2011

Custom Canadian Ring

This past summer I had the opportunity to design and make a truly unique one of a kind ring. My client brought me a gorgeous Ruby and a vision, the rest was up to me. He wanted a large chunky man's ring in both white and yellow gold with hand engraved details throughout. The project evolved as we went and I was pleased at my clients patients as I required shoulder surgery part way through the job. He opted to wait and have me see the project through to completion rather than have me take it elsewhere to have it finished. Thanks Martin. I carved the main body of the ring out of wax and had it cast in 14k white gold. I added 14k yellow gold details, including a removable stone bezel that I set from behind. By doing this the center stone can be removed for re-sizing or any other work or repairs that may be required in the future. It turns out that this ring is going to be my clients gift to himself for becoming a Canadian citizen, so his choice of what to get hand engraved was only fitting.